nexgrill owners manual
Nexgrill Owners Manual: A Comprehensive Guide
Welcome! This guide provides essential information for Nexgrill gas grill owners, covering assembly, operation, maintenance, and troubleshooting – ensuring optimal grilling experiences․
Nexgrill has rapidly become a trusted name in outdoor cooking, offering a diverse range of gas grills designed for both novice and experienced grill masters․ This manual serves as your comprehensive resource for maximizing the performance and longevity of your Nexgrill appliance․ Whether you’ve chosen a portable model or a feature-rich built-in grill, understanding its components and proper usage is paramount․
Nexgrill prioritizes quality and affordability, delivering grills packed with features typically found in higher-priced brands․ Accessing resources like the Internet Archive provides downloadable manuals (like the PTH106-SS model) for detailed guidance․ This commitment extends to readily available customer support and parts diagrams, ensuring a seamless ownership experience․ Proper assembly, as outlined in the following sections, is crucial for safe and efficient operation․
Understanding Your Nexgrill Model
Each Nexgrill model boasts unique features, but all share a commitment to quality grilling․ Before operation, familiarize yourself with the specific components of your grill․ Refer to the provided parts diagram – a vital resource for identifying burners, heat plates, and the grease management system․ Knowing these elements aids in both maintenance and troubleshooting․
Downloaded manuals, such as those available on the Internet Archive, often detail model-specific instructions (e․g․, 720-0433)․ Pay close attention to the gas type your grill is designed for (propane only, in many cases)․ Understanding the control panel settings and burner configurations will allow for precise temperature control and optimal cooking results․ Proper identification of components is key to accessing effective customer support when needed․

Assembly Instructions
Follow these steps to correctly assemble your Nexgrill․ Detailed instructions, parts lists, and required tools are crucial for a safe and functional setup․
Unboxing and Parts Inventory
Carefully unpack your Nexgrill, ensuring all components are present․ Cross-reference the included parts list – often model-specific like the PTH106-SS – with the contents of the box․ This initial inventory is critical․
Verify you have all essential items: grill body, side shelves, burner assemblies, cooking grates, heat plates, control panel, legs, wheels, and hardware (screws, bolts, washers)․ Downloadable manuals, available through the Internet Archive, can aid identification․
Note any missing or damaged parts immediately․ Retain the packaging material for potential returns or warranty claims․ A thorough inventory prevents delays during assembly and ensures a complete, functional grill․ Refer to diagrams if available for clarity․
Step-by-Step Assembly Process
Begin by attaching the legs to the grill body, securing them with the provided hardware․ Next, install the side shelves, ensuring proper alignment and tightening all bolts․ Carefully position the burner assemblies and connect them to the gas valve, verifying secure connections․
Place the heat plates above the burners, followed by the cooking grates․ Attach the control panel, connecting the knobs to their respective valves․ Refer to the model-specific instructions (like those for the 720-0433) for detailed diagrams and torque specifications․
Double-check all connections before proceeding․ A systematic approach, guided by the manual, ensures a safe and structurally sound assembly․
Tools Required for Assembly
Essential tools for assembling your Nexgrill include a Phillips head screwdriver, crucial for securing most components․ A flathead screwdriver is also needed for specific adjustments and connections․ An adjustable wrench is vital for tightening bolts and fittings on the gas valve and burner assemblies․
Rubber mallet assists with gently fitting parts together without causing damage․ Pliers can be helpful for manipulating smaller components․ While not always mandatory, a level ensures the grill sits evenly on the surface․
Gloves protect your hands during assembly, and safety glasses shield your eyes․ Having these tools readily available streamlines the process, as outlined in the assembly instructions․
Operating Instructions
Get started! Properly prepare your Nexgrill with the initial burn-off, then master lighting, temperature control, and diverse cooking techniques for delicious results․
Initial Burn-Off Procedure
Before your first cookout, a crucial step is performing the initial burn-off procedure․ This process eliminates any manufacturing residues or oils left from the factory, ensuring a clean and safe cooking surface․ Begin by fully opening the propane tank valve․ Then, ignite all burners on the grill and set them to the highest heat setting․
Allow the grill to run for at least 15-20 minutes with the lid closed․ You may notice some smoke or odors during this time – this is normal as the residual substances are burning off․ Ensure adequate ventilation during this process․ After the burn-off, turn off all burners and allow the grill to cool completely before proceeding with your first cooking session․ This initial step contributes significantly to the longevity and performance of your Nexgrill․
Lighting the Grill (Propane)
To safely light your Nexgrill propane grill, follow these steps carefully․ First, ensure the grill lid is open․ Then, fully open the propane tank valve by turning it counterclockwise․ Next, locate the grill’s ignition system – typically a push-button or rotary igniter․ Press or turn the igniter while simultaneously turning on one of the burner control knobs to the “High” setting․
You should hear a clicking sound and see the burner ignite․ If it doesn’t light after several attempts, turn off the burner control knob and wait five minutes before trying again․ If it still fails to ignite, consult the troubleshooting section․ Never lean over the grill when lighting it․ Always keep a safe distance and be aware of your surroundings․
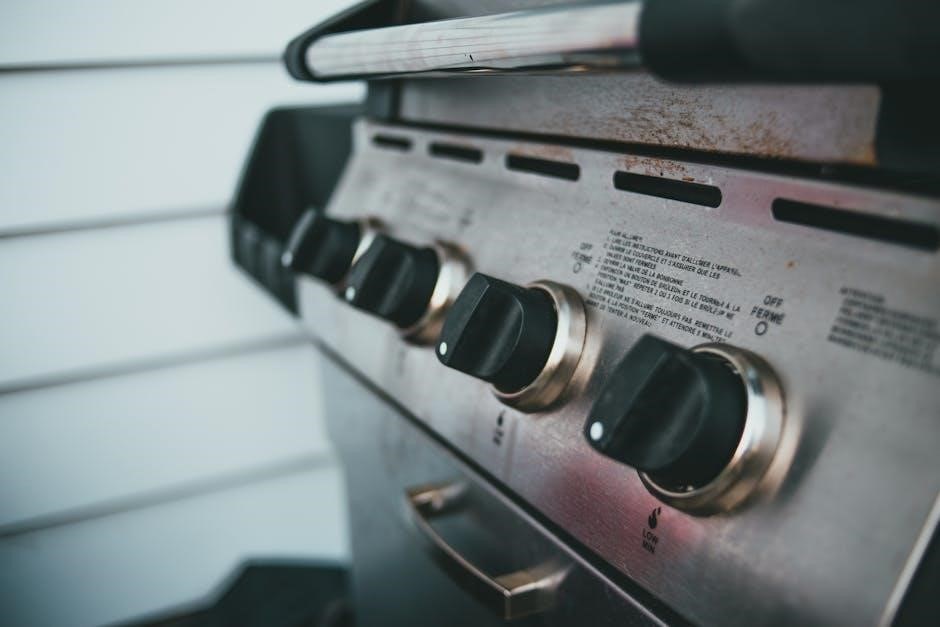
Temperature Control and Settings
Achieving the perfect cook relies on precise temperature control․ Your Nexgrill features burner control knobs allowing adjustment from “Off” to “High․” Lower settings provide gentler heat for simmering or keeping food warm, while “High” delivers intense heat for searing․ Utilize the grill’s lid thermometer to monitor internal temperature accurately․
Experiment with different burner combinations to create zones of varying heat – ideal for indirect cooking․ For example, light burners on one side for direct grilling and leave the others off for a cooler zone․ Regularly check the thermometer and adjust the knobs as needed to maintain your desired cooking temperature; Consistent monitoring ensures optimal results․
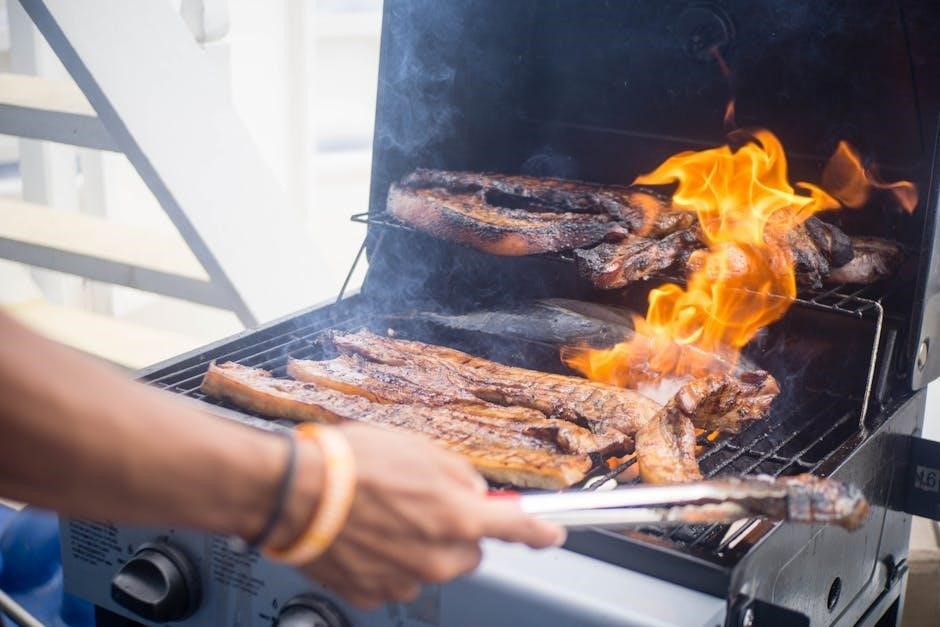
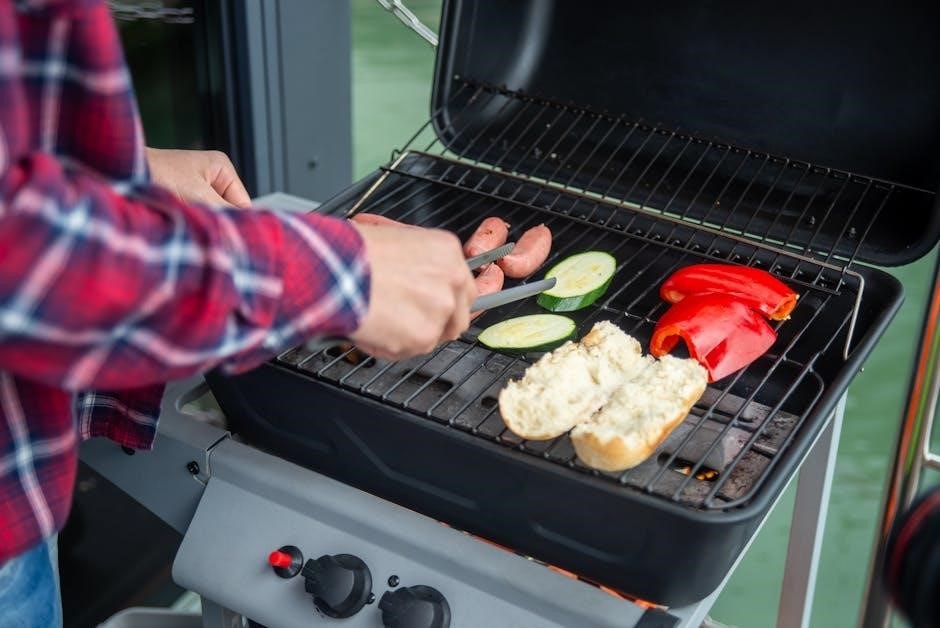
Cooking Methods & Techniques
Expand your culinary horizons with diverse grilling techniques! Direct grilling, using high heat directly under the food, is perfect for steaks, burgers, and vegetables – achieving quick searing and flavorful char․ Indirect grilling, utilizing heat from the side burners, excels at roasting larger cuts like chicken or ribs, ensuring even cooking․
Smoking, achieved with wood chips in a smoker box, infuses food with rich, smoky flavors․ Utilize marinades and rubs to enhance taste and tenderness․ Remember to preheat your grill thoroughly before cooking and allow food to rest after grilling for optimal juiciness․ Experiment and discover your favorite grilling style!

Maintenance and Cleaning

Regular upkeep is crucial! Consistent cleaning of burners, grease traps, and grill surfaces ensures optimal performance and extends the life of your Nexgrill․
Regular Cleaning Procedures
Maintaining a clean grill is paramount for both performance and safety․ After each use, allow the grill to cool completely before beginning․ Remove food debris from the cooking grates using a grill brush – stainless steel bristles are recommended for porcelain-coated grates to avoid damage․
Empty the grease trap regularly; accumulated grease is a fire hazard․ Wipe down exterior surfaces with a mild detergent and warm water․ For stubborn stains, a specialized grill cleaner can be used, following the manufacturer’s instructions carefully․ Inspect burners for blockages and clear any obstructions․ A thorough cleaning after every 5-7 uses will significantly prolong your Nexgrill’s lifespan and ensure consistently delicious results․
Burner Cleaning and Inspection
Regular burner maintenance is crucial for efficient and safe grilling․ Before inspection, disconnect the propane tank! Remove the cooking grates and heat plates to access the burners․ Visually inspect each burner for signs of corrosion, damage, or blockage․
Use a wire brush or pipe cleaner to clear any clogged burner ports․ Ensure the ports are open and unobstructed for even flame distribution․ Check the burner mounting brackets for stability․ If a burner is damaged, replace it immediately with a genuine Nexgrill replacement part․ Reassemble carefully, ensuring proper alignment before reconnecting the gas supply and testing the burners․
Grease Management System
Nexgrill grills feature a grease management system designed to minimize flare-ups and simplify cleaning․ Regularly emptying the grease tray is essential for safe operation․ Locate the grease tray beneath the burners and slide it out carefully․ Dispose of collected grease responsibly – never pour it down the drain!
Inspect the grease tray pathway for any blockages․ A buildup of grease can restrict flow and potentially cause a fire․ Clean the pathway with warm, soapy water․ Consider lining the grease tray with aluminum foil for easier cleanup․ Maintaining a clean grease management system ensures optimal grill performance and reduces the risk of hazards․
Long-Term Storage Instructions
Preparing your Nexgrill for long-term storage requires thorough cleaning and protection․ Begin by completely cleaning the grill, including burners, cooking grates, and the grease management system․ Disconnect the propane tank and store it separately in a well-ventilated area, following all safety guidelines․
Cover the grill with a weatherproof grill cover to shield it from the elements․ Store the grill in a dry, sheltered location, such as a garage or shed․ Before reconnecting the propane tank next season, inspect all gas connections for leaks using a soapy water solution․ Proper storage extends the life of your Nexgrill and ensures it’s ready for many grilling seasons․

Troubleshooting Common Issues
Facing problems? This section details solutions for typical Nexgrill issues like ignition failure, uneven heating, and potential gas leaks – ensuring safe operation․
Grill Won’t Light
Problem: Your Nexgrill grill fails to ignite, preventing enjoyable cooking․ First, ensure the propane tank is full and properly connected․ Check the valve – is it fully open? Next, inspect the igniter; a weak spark is a common culprit․ Try replacing the battery with a fresh one․
If the igniter still fails, attempt lighting with a long-handled lighter near the burner․ If it lights this way, the igniter needs replacement․ Clean the burner tubes; clogged ports hinder ignition․ Also, verify the burner isn’t obstructed by debris or grease buildup․ A blocked burner can prevent gas flow․ Finally, confirm the safety shut-off hasn’t engaged – a clicking sound indicates this․
Uneven Heating Problems
Issue: Experiencing hot and cold spots across your Nexgrill’s cooking surface? Several factors could be at play․ Begin by checking burner flame height – are all burners producing consistent, blue flames? Low or yellow flames indicate obstructions․ Thoroughly clean the burner tubes, removing any debris or rust․
Ensure even distribution of charcoal (if applicable) or that the burner ports aren’t clogged․ Also, verify the heat shields are correctly positioned above the burners․ Improper placement can disrupt heat flow․ Uneven gas pressure can also cause this; check the regulator․ Finally, avoid overcrowding the grill; too much food lowers the overall temperature․
Gas Leak Detection
Safety First! If you suspect a gas leak, do not operate the grill․ Immediately turn off the propane tank valve․ To check for leaks, prepare a solution of soapy water (dish soap and water)․ Apply this solution to all gas connections – hose, regulator, valve connections, and burner connections․
Watch for bubbles․ Bubbles forming indicate a leak․ If a leak is detected, tighten the connection․ If tightening doesn’t resolve the issue, replace the faulty part․ Never use a flame to check for leaks! A strong gas smell, even without bubbles, warrants immediate attention and professional inspection․ Disconnect the propane tank and contact customer support․
Safety Precautions
Prioritize safety! Always follow safe gas handling practices, ensure proper grill placement with ventilation, and actively prevent dangerous flare-ups during operation․
Safe Gas Handling Practices
Propane safety is paramount․ Always inspect the propane tank and hose connections for leaks before each use, utilizing a soapy water solution – never a flame! Store propane tanks outdoors in a well-ventilated area, away from heat sources and direct sunlight․
When connecting or disconnecting the propane tank, ensure the grill burners are turned off․ Never attempt to repair or modify the gas supply system yourself; contact a qualified professional for any repairs․ Be aware of the smell of gas – if detected, immediately turn off the gas supply at the tank, evacuate the area, and contact your local fire department․
Properly dispose of empty propane tanks according to local regulations․ Avoid dropping or subjecting the tank to rough handling․ Remember, responsible gas handling ensures a safe and enjoyable grilling experience․
Grill Placement and Ventilation
Proper placement is crucial for safe operation․ Position your Nexgrill grill on a level, non-combustible surface, a minimum of 10 feet away from any walls, structures, or combustible materials․ Ensure adequate ventilation around the grill to prevent carbon monoxide buildup․
Never operate the grill in enclosed spaces such as garages or under covered patios without sufficient airflow․ Avoid placing the grill directly under overhead obstructions like trees or awnings․ Protect the grill from the elements – rain, snow, and excessive wind – to prolong its lifespan and maintain optimal performance․
Regularly check the surrounding area for any flammable materials before each use․ A well-ventilated and appropriately positioned grill contributes significantly to a safe and enjoyable cooking experience․
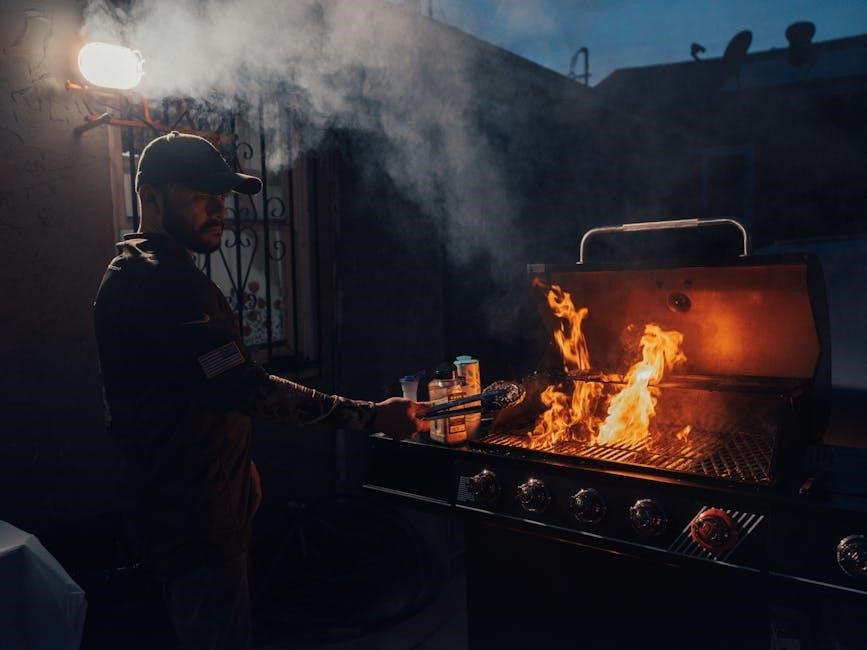
Preventing Flare-Ups
Flare-ups are common during grilling, but easily managed․ Excessive grease buildup is the primary cause; therefore, regularly empty and clean the grease management system․ Trim excess fat from meats before cooking to minimize dripping․ Avoid leaning directly over the grill when lighting it or during cooking․
If a flare-up occurs, immediately move the food to a cooler part of the grill․ Never use water to extinguish flames – this can cause dangerous steam explosions․ Keep a spray bottle filled with water nearby for surrounding areas, not the grill itself․
Utilizing lower cooking temperatures and employing indirect heat methods can also significantly reduce flare-up occurrences, ensuring safer and more controlled grilling sessions․
Nexgrill Parts Diagram & Support
Explore detailed diagrams to identify components and access comprehensive customer support resources for your Nexgrill grill, ensuring easy maintenance and repairs․
Identifying Grill Components

Understanding your Nexgrill’s anatomy is crucial for maintenance and repairs․ Key components include the burners, which distribute heat; the cooking grates, where food is placed; and the heat plates, designed to vaporize drippings for enhanced flavor․
The igniter system initiates the grilling process, while the control knobs regulate temperature․ Don’t forget the grease management system, vital for preventing flare-ups and simplifying cleanup․ The grill body provides structural support, and the side shelves offer convenient workspace․
Refer to the detailed parts diagram included with your manual or available online․ Familiarizing yourself with these components will empower you to perform routine maintenance, troubleshoot issues, and confidently order replacement parts when needed, maximizing your grilling enjoyment․
Accessing Customer Support
Need assistance with your Nexgrill? Several avenues are available for support․ Begin by consulting the comprehensive troubleshooting section within this manual, addressing common issues․ For further help, visit the official Nexgrill website; often, a detailed FAQ section and downloadable resources are available․
You can also reach Nexgrill customer service directly via phone or email – contact details are typically found on their website or within your product documentation․ The Internet Archive hosts user manuals and potentially helpful community forums․
When contacting support, have your model number readily available for efficient assistance․ Don’t hesitate to utilize these resources to ensure a seamless grilling experience!
Leave a Reply